What follows is not really a tutorial, but more a "making of". I'm not a 3D artist nor an expert on Maya, but I will try to answer any questions. I will start with the making of the wheels that will be used later. For this purpose I had set up an image projection for the side view and added tubes showing the rough dimensions of the tire and rim.
Then I drew a profile curve, revolved it into a tire and set up a cylindrical UV texture coordinate, needed for bump mapping.
Next I used revolve to create the rim, the axel of the rim and then a cylinder for the rim spike.
I cloned 32 spikes using Duplicate Special to create the complete rim.
I added "Gametechnology" text as a tire brand and bended it.
With the wheel done, I moved to the handle for opening the bonnet. As the handle is small and does not need to be modeled in much detail, I used polygon operations on a box to get the basic shape and then applied smooth to it. I started with a box and then pulled the vertices the get the silhouette
I then extruded the top faces and re-sized them.
And finally, I extruded the actual handle part of it.
With the small details done, it's time to move on to the body of the car. There are royalty free schematics on the internet for most cars, even exotic ones like the 1954 Fiat Turbine. I used three projections, one for each view.
In hope to work with NURBS, I drew the cross sections of the car.
After few tries with NURBS, I decided to leave that to the industrial designers around the world and other skilled professionals and move on to SubD surfaces. I used Loft to join the cross sections and get a polygonal mesh, which provided a better starting point then a simple box.
The next few steps show the process of refining the mesh into the car shape using just few operations like extrude, remove, append, split and merge vertex.
I also cut off the faces where the windscreen and windows will be. The original faces were curved along both axes which is usually not the case for glass, especially not in the 50's. This is very important for realistic reflections and refractions, so I decided to model them later instead of using the faces already there.
Conversion of the model into SubD showed that the topology of the model needs to be changed in order to get a smooth surface fitting the car. All the faces with more than four vertices needed to be modified and while keeping as regular structure as possible. Triangles and vertices shared by more than 4 edges were not my friend as they can break the surface too.
Next I created the windows from the refined mesh.
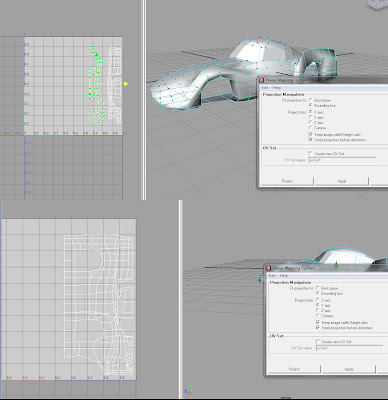
Early in the making of the model I decided to use bump map for some of the small details in the body instead of the modeling them. Having the low polygon mesh, I thought it would be the best time to create the UV coordinates. I used manual selection of faces and planar projection on them the get the basic layout and then manually stitch them in the UV editor.
Conversion to SubD proved to be quite destructive for the UVs as lines are mapped onto curved lattices and the tessellation is adaptive.
I used a Subdiv proxy instead, which was easier to control because of the regular tessellation. Next few screen shots show creasing on some of the edges and vertices.
With the final structure of the fully defined I moved to creating the frames for the windscreens using extrusion and later the windscreens themselves. We can also see some of the early renders.
Next I added some chrome details using lofted curves on the mesh and then extruding the polygons on them. I also added some interior, which simply serves to prevent the car from looking as an empty shell.
The geometry is finally finished, as we can see from the render below.
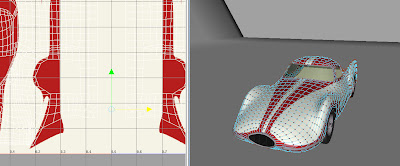
Next I added bump mapping and did refinements on the color texture mapping. To do this, I had to unwrap the UVs, as bump mapping in Maya uses world coordinates in combination with UVs and therefore did display properly on the mirrored side of the body. The screenshots shown the final UV setup for the bump map and color map
I will not go into more details about the texturing process, since is not part of the assignment. I'll just state that it took a surprisingly big amount of the time (more than 30% of the total.
With the model done it was time to render it. The materials in use are just basic blin for body, anisotropic for the chrome parts and transparent glass with index of refraction around 1.4. As all materials are highly reflective, I added some objects to the scene to be reflected into the car. First, a background was added, similar to a backdrop used in photo studios that doesn't have any visible sharp edges. In addition I added two stripes to further pronounce the shape of the body. For lighting, I used a simple three light setup with area lights and multisample shadows. All of this can be seen on the screenshot.
The final addition was a slight tint if green in the glass material, as this draft renders shows.
Done using an Intous 4 Wacom Tablet and Maya 2009.


Bravo!
ReplyDeleteThanks pice!
ReplyDeleteNice model. I am looking to 3D print one for a pinewood derby car. Would you be willing to share your model?
ReplyDelete