Thursday, May 5, 2011

Building Your Own Game Engine - Gameplay

This article will focus on gameplay, the part of the code that allows making the game fun. In a smaller game, like ours, the gameplay code can take substantial chunk of the whole code-base. The gameplay in The Jelly Reef was not scripted and completely integrated with the rest of the code; and as such written in C#. The separation between what can be considered engine code and gameplay code was mostly logical but still some physical structure was kept.
There are generally four places where gameplay code goes in our engine. Of course, our primary gameplay element is the water itself as the player interacts with it. The implementation of the water waited for the concept of the game to be completely defined, so after we know what our game will be about we started building the water dynamics. Our first try was with simulated fluid dynamics, but after playing with few games and simulators that use fluid dynamics we realized that it might not be the best fit for The Jelly Reef. Fluid dynamics are somewhat difficult to program and even more difficult to make them run efficiently on a larger scale. But the real problem was that they were not a good fit for gameplay and can be notoriously time consuming to tweak. My solution was to fake it and I am talking Shanghai Rolex kind of fake. The water in The Jelly Reef is a grid of 2D vectors representing velocities, what we (not physically correctly) called flow field. The grid is treated as a gray-scale image and every update is filtered using a set of low-pass filters. The resulting image summed with the current image using a tweakable weight factor. The low-pass filtering is done by convolution with a 3 by 3 kernel, which is chosen based on the direction of the water at that cell of the grid. There are 4 kernels in total; horizontal, vertical and two diagonal ones. Basically the value of atan2 is mapped directly into an index in the kernel array. What follows is a piece of code that does exactly that and in some way is the heart of our game.
// FlowField.cs
public class FlowField : ISceneNode
{
  #region Weights

  static float lon = 3;
  static float lat = 0.5f;

  private static float[,] verticalKernel =
    new float[,]{ {lat, lat, lat},
                  {lon, lon, lon},
                  {lat, lat, lat}};
        
  private static float[,] horizontalKernel =
    new float[,]{ {lat, lon, lat},
                  {lat, lon, lat},
                  {lat, lon, lat}};

  private static float[,] diagonalKernel0 =
    new float[,]{ {lat, lat, lon},
                  {lat, lon, lat},
                  {lon, lat, lat}};

  private static float[,] diagonalKernel1 =
    new float[,]{ {lon, lat, lat},
                  {lat, lon, lat},
                  {lat, lat, lon}};

  private static float[][,] kernels = new float[][,]         
  {
    horizontalKernel,
    diagonalKernel1,
    verticalKernel,
    diagonalKernel0,
    //
    horizontalKernel,
    diagonalKernel1,
    verticalKernel,
    diagonalKernel0
  };

  #endregion

  public void Update(float dt)
  {
    // Some update code...

    // Go through all the cells
    for (int i = iFrom; i < iTo; i++)
    {
      for (int j = jFrom; j < jTo; j++)
      {
        // Get vector angle
        float theta = (float)Math.Atan2(vectorField[i, j].Y, vectorField[i, j].X);
        //
        theta += MathHelper.Pi / 8; // Add half a section
        // get index
        int kindex = (int)Math.Floor(theta * (8.0f / MathHelper.TwoPi));
        kindex %= 8;                // Remove extra sections
        //
        float[,] kernel = kernels[kindex];

        // Convolve using this kernel!
      }
    }
  }
}

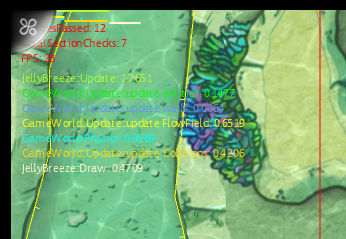
All the kernels are energy-preserving, so a dampening factor is used to stabilize the velocity field. All hand movements add energy to the system so without dampening the simulation would in fact exploded. This system made interacting with the water intuitive while giving us the ability to easily tweak its behavior. The video below shows a visualization of the velocity field, something that we stared a lot when designing the first levels. The video below shows the debug view of the our flow field.
Most of the levels in our game had regions that were not part of the simulated water field, usually rocks and other such big obstacles. The water should not flow through these obstacles so those regions should be excluded from the flow field. For this purpose, when loading the level we employ a flood fill algorithm, that expands until it hits a wall, that marks all the cells that are part of the flow field. By skipping calculations on those cells we also optimized the flow field significantly. The flow field’s value can be read using nearest neighbor or bilinear sampling, depending on the quality and performance needs. Bubbles for example use nearest neighbor as there are many of them and the physical simulation takes care of the trajectory smoothing. For the jellies on the other side we used bilinear sampling as motion quality and responsiveness was paramount.

Next place where gameplay can be added is the update method of the GameWorld class. The GameWorld has been designed to be extended and new functionality can be added by the inheriting class. The update method is the place where game wide game-play code should be, like checking winning and losing conditions or similar stuff. The inherited class would automatically keep all the functionality of the GameWorld class, like the streaming and real time editing but it needs to do XmlInclude for all the entity types in the class attributes. Much of the gameplay code is in the Update method of the different entities and most entities are in fact built for specifically for that purpose. Enemies, propellers and pipes are all examples of such entities. If the entity is dynamic it can inherit the MovingEntity class and get all the functionality for physically simulated motion. Finally the game implements a mechanism to respond to collision events. The user could subscribe collisions of different pairs of entity types. For example a collision of a jelly with a cannon ball would result in instant death and the event can be used to play a sound, death animation and so on. What follows is are parts of the code doing exactly that.
// JellyWorld.cs

// Include all types that might be used in the game
[XmlInclude(typeof(Jelly))]
// More includes ...
public class JellyWorld : GameWorld
{
   public void SetEvents()
   {
      // Add Jelly vs Propeller
      int hash = EntityTypes.HashCode(EntityType.Jelly, EntityType.Propeller);
      this.collisionManager.SubscribeForCollision(hash, JellyPropellerCollision);

      // Set more events ...
   }

   public void JellyPropellerCollision(ref Contact contact)
   {
      // Play gruesome death, scary sound and remove jelly
   }

   // More JellyWorld code ...
}
From the two entity types hash is created and is used to index the event method to be called. The hash is calculated by using the first 16 bits to store the first type and the second 16 bits for the second type. As long as there are less than 65536 entity types this works. The method gets a reference of the contact information which can be edited too. The above code for example sets the handled flag to true, so that the contact is ignored by the contact resolver in the physics pipeline. Consequently, physics and collision handling is exactly what the next article will be about. I'll end this post with a montage of our game.

The Jelly Reef from Adriaan de Jongh on Vimeo.

Wednesday, March 2, 2011

Building Your Own Game Engine - Tools II

This is the second article on tools that we developed and used during the making of The Jelly Reef. It covers our profiler, the level editor and few external tools.

Profiler
Performance is essential for any game and knowing how big of a chunk out of the update time goes to different tasks can be very helpful. For this purpose, we built a profiler early on and always kept a watch over the performance. The profiler has few roles. Firstly, to have a bunch of variables that can be used as counters, like counting the number of collision checks, drawing calls, triangles and such. Secondly, to count framerate. And most importantly, to measure execution time of different sections of the code. The profiler is implemented as a singleton manager, as discussed in the previous post. All the counters are accessible via a public dictionary. The profiler itself only draws the counters as name and value pair. It is up to the user of the counter to take care of the value, like resetting the counter zero or incrementing it.
The game uses a fixed framerate of 60 FPS, but we still use a framerate counter to detect if drop in performance occurs and eliminate the cause. For measuring section execution time we use the Stopwatch, which is a high-resolution timer. At the beginning of update the stopwatch is reset. At the beginning of the section in the update, like collision detection or water simulation, a the BeginSection method is called with the name if the section. When done, the EndSection method is called with the same name of the section. The profiler simply samples the time of the stopwatch so section can be nested or overlap. The profiler draws a bar from the beginning of the section to the end, using the width of the screen as a reference for the 0.0166 seconds (60-th of a second) available CPU time per update. So if we reach the right side of the screen, we know we need to optimize something, and we might as well start with the longest bar. The difference between the end and the beginning of a section gives its duration and this is shown just below the bars with the same color as the corresponding bar. The profiler is only compiled when the PROFILE symbol is defined, so just like the debug draw it is not part of the final build. Unlike the debug drawing, it is also compiled with the release builds of the game to track their performance as the C# compiler can optimize the release version quite a bit.

Editor
What started as a runtime inspector for the entities in the gameworld, quickly turned into a editor that we used to create the levels. This means that we used an in-game editor to author and edit the levels, rather than a separate tool. In fact at any time you can press E button on the keyboard and bring up the editor. This means very short turnaround times for our designer, as changing a value like mass or a position of a wall has an immediate effect in game. On the other hand, the user needs to remember that the game is running at all times. Physics and collision can easily be broken by large changes while the game is running. That is why the editor got a pause button, but somehow it was almost never clicked. And the programers need to remember that the same code runs during designing and playing. The editor is not included in the release build and the Surface unit doesn’t need a keyboard in user mode, so tampering with the game is not a problem.
The editor is very much based on features available in C# the .NET Framework. The editor is basically a window with a tree control a property grid, both of which a regular windows forms. The tree control is depicting the world hierarchy and allows the user to select one or more entities in the world. For the window to be able to create this hierarchy all the object that we would like to display in the editor must implement the ISceneNode interface.
/// 
/// Alows browsing the scene graph in a simple way
/// 
public interface ISceneNode
{
   IEnumerable<ISceneNode> GetChildNodes();
}

// GameWorld.cs
public class GameWorld : ISceneNode
{
   // ...
   public virtual IEnumerable<ISceneNode> GetChildNodes()
   {
            foreach (BaseGameEntity o in Entities) { yield return o; }
            //
            foreach (Wall w in Walls) { yield return w; }            
            //
            foreach (ParallaxLayer l in  Layers) { yield return l; }            
#if DEBUG
            yield return DebugDraw.Instance;
#endif
   }
   // ...
}

Using the interface window can build the tree recursively. This is a simple approach also lets a put things in the tree that are not really part of the world, but we would like to be able to tweak them too, like the options for the debug drawing.
The property grid on the other hand required a bit more attention. The property grid in .NET is uses reflection to give the user an interface to tweak any public property of any object, but some care must be taken. Firstly non-primitive types like our vector implementation would need to implement a conversion to a type that can be displayed properly. This actually took few days to get right, so that is doesn’t delete data when some has typed something wrong. Without some kind of description the user interface would be very difficult to use as it might be hard for the designer to know what linear dampening might mean, there might be too many properties that are public and they are not sorted in any way. So the entities have to have attributes attached to all their public properties, as the code below shows.
class MovingEntity : BaseGameEntity // Which implements ISceneNode
{
   // ...

   #if WINDOWS
   [Category("Physical Parameters")]
   [Description("Max turn rate in deg/s")]
   #endif
   [XmlIgnore]
   public float MaxTurnRate
   {
      get { return maxTurnRate; }
      set { maxTurnRate = value; }
   }
   // Field
   protected float maxTurnRate;

   // ...
}
As it turns out these attributes, especially the description, also help keep code well documented for programmers too. We always knew if a rotation property is in angles or radians. The component model API is only available on Windows, so some preprocessor guards come in handy if you would like to compile the project for other platforms like Xbox and Windows Phone. Our classes already had the XML attributes, so the code for a single property can be a bit long, but maintenance and ease of implementation made all the scrolling totally worth.
A very important part of the editor also were the different design modes. With a press of a button on the keyboard the game would switch to wall editing mode or entity manipulation mode. We added those model in a somewhat ad hoc manner and were more or less hacked into the game. Eliminating turnaround  time for the designer was a nice plus and it worked great for this game, but this approach doesn't scale well. In retrospective I think I might have been better to build an editor that still uses the engine with all of its classes and functionality but built a separate editor.

External Tools
Aside from the usual content creation applications like Photoshop and After Effect, we used few plugins for Photoshop some other tools. As we learned Photoshop doesn’t work with explicit alpha when saving in the PNG format, so we needed something that can roll back the time to Photoshop 4.0 when it was the last time it did work. Luckily there was a plugin for that. Another plugin, called Solodify, was used to fade the edges in the color channels so that no white pixels appear when alpha testing is used for rendering. The water caustics were precalculated using Caustics Generator, which available for free. I like to work with FX Composer for developing shaders regardless of the fact that is was a bit of overkill for the few shaders we needed. FX Composer is also available as a free download on nVidia’s developer website. As last line of defense when I need to debug my rendering code, I use PIX. This extremely powerful tool comes with the DirectX SDK and can capture every single call to the GPU, including its internal state and even show the intermediate rendering results.

Sunday, February 20, 2011

Building Your Own Game Engine - Tools I

This article will focus on the tools that were developed and used during the making of the game. It turn out to be a rather large article so it's split in two posts. Basically a tool is everything that helps get the game done, like a level editor or a profiler. We used some external tool aside from the content creation applications like, Photoshop and After Effects. I will cover those after covering our own tools.

Managers
Before jumping to the different tools, I will first give a short overview of the managers the we used in the engine. There are certain services, routines or data that might be needed at any time in the execution of the game. File reading, resource loading and camera properties are good examples of such services. To make them available at all times we use managers, which are just simple singleton objects. At first we used static methods to wrap the actual object calls, making the calls a bit shorter, but we later decided for a more simple implementation. What follows is a short piece of the code from the camera class.
// Camera.cs
public class Camera : ISceneNode
{
   private static Camera instance;

   // Gets the instance of the camera; there can be only one.
   public static Camera Instance
   {
      get { return instance; }
   }

   public Camera(float camSizeX, float camSizeY, GameWorld world)
   {
      // ctor code ...
   }
   
   public void Initialize()
   {   
      instance = this;
   }

   // some camera code...
} 
There is only one instance of the singleton object that can be referenced. The parameters in the constructor give the dependencies order among the managers. This strategy was used for many of the tools that will be discussed next.

Debug Drawing
The very first tool that was implemented was the debug drawing. Textures might go missing, shaders might be buggy, triangles might get clipped, scaled, culled and not render at all. Developing a game in the dark can be extremely frustrating and inefficient, so this is where the debug drawing comes in to let us know exactly what is happening in the game. In a game engine usually drawing should only be done within a draw method and might need to set up many shading and rendering parameters. This is the exact opposite of what we need, so we made a debug draw that allows us to call drawing of colored lines from anywhere in the code. This can help visualize local variables like velocities, grids and such. Here is a short piece of code from the debug drawing manager.
// DebugDraw.cs
public class DebugDraw
{          
   protected static DebugDraw instance;

   // Needs a static instance to be able to answer static calls
   public static DebugDraw Instance
   { get { return instance; } }

   // lines
   public VertexPositionColor[] lines;
   public int linesCount;

   public DebugDraw(Game game)
   {
      graphicsDevice = game.GraphicsDevice;
      effect = new BasicEffect(game.GraphicsDevice, null);
      lines = new VertexPositionColor[80000];
      //
      linesCount = 0;
   }

   public void Initialize()
   {
      // Set static instance to this
      DebugDraw.instance = this;
   }

   public void DrawLine(Vector3 start, Vector3 end, Color color)
   {
      if (linesCount + 2 > lines.Length)
         return; // Silent error

      lines[linesCount++] = new VertexPositionColor(start, color);
      lines[linesCount++] = new VertexPositionColor(end, color);
   }

   public void Update(float dt)
   {               
      // Clear all out
      linesCount = 0;
   }

   public void Draw(float dt)
   {
      if (linesCount > 0)
         // call XNA line drawing ...
   }   
}
The approach is very simple; all the vertices are stored in a fixed array and the calls are accumulated into the array. During the render phase, lines are drawn with a single draw call, which is very efficient.  Circles and such are simply composed out of multiple line segments. Similarity, methods for drawing points were added too. With this in place we could visualize collision geometry, contact points, forces and similar stuff.
The next posts will discuss the profiler, level editor and some external tools, followed by a post on the water simulation and game play. So if you are curious, you can click the follow button in the top left  corner or subscribe to the feed with you favorite reader.

Tuesday, February 8, 2011

Building Your Own Game Engine - Basic Mechanisms

There are some game engine mechanisms that are needed in almost any game, and this article will cover exactly that. As I stated in the last article, the work on this common set of features started before we even knew what game we were making. While I have worked on large chunks of a complex system, this was my first time as a lead programmer and building an engine from scratch. So I consulted my favourite books, adapted some ideas from there to fit our needs and was ready to start.
At the very low level we were free from having to develop a memory management system, as we used C# and could let the garbage collection take care of that. Sometimes however the garbage collection can cause hiccups, so special care need to taken. The garbage collection runs fastest when it doesn't run at all, so we had almost no dynamic memory allocation after a level has been loaded. On way we tried to enforce this was to have our low level stuff like math, physics, collisions, render jobs and such as value types. Declaring a structure (struct) instead of a class in C# is not enough, as the garbage collection is a bit more complicated and sophisticated than that, so we made sure that variables are statically  scoped whenever possible. Additionally, we passed by reference all bigger structures to avoid copying memory around.
XNA is mostly a 3D rendering framework, so The 2D math that is part of the framework was in my opinion not a good match to what we needed for game. So, we implemented a 2D vector and a matrix class, as well as some helper methods for transformations. These can be lifted from any book in the field. Because we didn't do much rigid body physics or angular interpolation, there was no special class for rotations. In future I would prefer to use spinors (2D equivalent of quaternions) or complex numbers for the purpose. The game structure itself was kept very simple. Everything in the game was derived from GameEntity and all the entities were kept in the GameWorld. The game world had no hierarchy, just a list of level of entities. What follows is a piece of code from the GameWorld class and BaseGameEntity class that I will elaborate on.
// Gameworld.cs
public class GameWorld
{
   // some code ...

   // All the entities in the world
   public List<BaseGameEntity> Entities
   { get; set; }

   // Adds an entity to the world. This can be anything.
   public void AddEntity(BaseGameEntity entity)
   {
      AddQueue.Add(entity);
   }

   // Removes an entity from the world
   public void RemoveEntity(BaseGameEntity entity)
   {
      RemoveQueue.Add(entity);
   }

   public void Update(float dt)
   {
      // Add entities
      foreach (BaseGameEntity bge in AddQueue)
         Entities.Add(bge);
      AddQueue.Clear();
      
      // Update entities
      foreach (BaseGameEntity bge in Entities)
         if(bge != null)
            bge.Update(dt);

      // Remove entities
      foreach (BaseGameEntity bge in RemoveQueue)
      {
         // Call cleanup on the entity
            if (bge is IDisposable)
               (bge as IDisposable).Dispose();
            Entities.Remove(bge);
      }
   }
   // more code ...
}

// BaseGameEntity.cs
[Serializable()]
public class BaseGameEntity
{
   // Refence to the world
   protected GameWorld world;

   // Unique ID of the enitity.
   [XmlAttribute]
   public int ID
   {
      set {
         this.id = value;
         // Make sure their are unique
         if (id >= nextValidID)
            nextValidID = id + 1;
      }
      get { return id; }
   }
   //each entity has a unique ID
   private int id;

   // Every entity has a type associated with it (health, troll, ammo etc)
   public EntityType Type
   { get; set; }
   
   // Called when loaded
   public virtual void Initialize(GameWorld gameworld)
   {
      // init code ...
   }

   // some code ...
}

The flat structure and very simple sequential update are not very flexible, an interactive character on a moving platform might be difficult to implement for example, but was sufficient for our needs. Additionally this approach can be memory coherent, which is very good for cache, which is very important performance. The update method of each entity handles everything from physics and game-play to animation. I opted for simple floating point time in seconds as parameter instead of the XNA's GameTime structure as I it doesn't require every class to calculate time, which can bring inconsistencies, and it allows for easy time manipulation like bullet time or pause. So that there is no inconsistency during the execution of a single world update, entities could only be added and removed at the begging and end of it. Queues of such entities are kept for this reason.
From the piece of code from the BaseGameEntity class we can see few things.
  • Every entity has a reference to the game world and that is how it communicates with other entities and can be aware of its soundings.
  • A unique ID is kept to help identify the entities. This ID is persistent and stored in the level.
  • We have a game entity type for different things in the level, mostly used for game-play and collisions. This is different from the .NET object type, as there can be many different enemies but they are all of the same class.
  • We are using the .NET framework XML serializing support for writing and reading data, so our executable classes are also our data containers. This can be seen from the many annotations throughout the code.
This last bullet point was not all that straight forward to implement as it may seem. Firstly, the game scene has a general graph structure, while an XML file has a hierarchical structure and cannot represent the scene properly. Secondly, when reading an object from an XML file, the no arguments constructor is always called. These are remedied by calling an initialization method on all entities after streaming, that has a similar role to a constructor. For cross-reference unique entity IDs are stored in the XML and during the initialization references to the actual objects are obtained by querying the world.
When a level grows to contain couple of hundred entities, it's obvious that you would like to change properties in bulk, and that is where a settings file comes in. This is just another XML file which can be referenced by an entity. We decided settings to be strongly typed so settings for a jelly are different from settings for a blow fish even if the contents are the same. Settings are implemented as simple classes so they can be inherited when needed. So if a MovingEntity extends BaseGameEntity, MovinEntitySettings can extend BaseGameSettings, simplifying the maintenance. The settings are applied in the Initialize method and all entities have a GetSettings and SaveSettings methods. The classes extending the entity class must handle all the details of saving the settings, as it's the only class that knows the type of the settings class. This approach puts a bit of extra work for every type that needs to have settings, but it's flexible and can even allow for structured settings, like a blowfish settings having different sprite settings for all the animations.
These settings files might need to be read frequently during the game, as each created rocket or a bullet might need their settings for example. Reading from disk can do some bad hiccups and there is the added slowdown of parsing the file, allocating memory. For this purpose we cache the settings, which a usually very small data structures and more over, are shared among entities with the same settings. We simply use the file name as a key in a dictionary. The same caching is in fact used for all resources to avoid duplicate data in the game. Our resource manager handles this internally, so it's completely transparent for the rest of the code.
There is always room for improvement, so I'll mention few things. For a future project I might opt for a different streaming solution or make macros that do most of the tedious work for me, but the overall performance and flexibility during the development was quite good. We had a inconsistent way of using the entity types, which lead to some funky bugs. A more structured update method that can handle different priorities and different logical steps might also be beneficial.
The next article will be on tools and the world editor.

Sunday, February 6, 2011

Building Your Own Game Engine - Introduction

Fast forward from my last post, the game that I was making with students from the Utrecht School of Arts (HKU) for the Dutch Game Garden is done. At least within the project frame that was given by the school. We decided for "The Jelly Reef" as a name and you can read more at www.thejellyreef.com. The game has been showcased on few occasions and has received some very positive reactions. This is the first in a series of six articles on how the game was developed. The articles will cover some details  of the game's engine structure and all the technical choices made along the way. The next articles will focus on Basic Structure, Tools, Game Play, Physics and Collision Detection, and Graphics. The articles should be informative to any small team trying to develop a game, as much of the patterns reappear again and again in very different types of games. First, a screen-shot can give you an idea about The Jelly Reef and there is a montage at the end of the article.

Before there was any game, there was the team and the clients request, so many of the initial decisions came from there. The team was 9 peoples strong; 3 programmers, 4 artist and 2 designers. Two of the programmers on the project, including myself were part time and the third one had a background in interaction design with little experience in programming. All the artist on the project had background in 2d art. For the vast majority of the project, design was handled by the lead designer, as the other designer was perfecting the art of slacking. We knew that we were working with the Microsoft Surface, so technical choice number one was the choice of language, C# and was done for us. Because of performance reasons mentioned in the previous post, we decided to go for XNA instead of Silverlight. With the background of our art guys we knew that we would be making a 2d game and the top down perspective of the device reinforced the decision. While we did have the option to use a game engine like Unity, we didn't think that it would be a good fit the projects needs, so we decided to build our own.
For the first three weeks the team was brainstorming on possible concepts. Time is always in short supply so the tech team was eager to start working on something, to avoid sleepless nights at the end of the project. We discarded some of the concepts and merged features from similar concepts. From the handful of distilled concepts, we took a common denominator and started working on that. This is exactly what the next article will discuss.

Sunday, November 7, 2010

Developing for the Microsoft Surface

My plan for the current semester was definitely to the try out some touch devices, which is why I bought an iPod touch. But little did I know that I would be developing for the Microsoft Surface. I am working with the Utrecht School of Arts (HKU) on a project for the Dutch Game Garden, and so far looks quite promising.
The Microsoft Surface has a huge area that can detect and track an almost infinite amount of fingers. Ok, not infinite, but more than it makes sense to have on it at any given time. Because it uses image processing and not touch, it has some more tricks up the sleeve. For example, tags recognition, markings that you can print or stick to any object and track it on the surface. As well as raw image processing if needed. The SDK is .NET based, so you get to access the .NET Framework and you can use both Silverlight and XNA.
On the other, the machine is hugely underpowered and the GPU is especially ridiculous, considering the $12000 or so price tag. Most of the demos and samples had a reaction lag unacceptable for most game scenarios, which did make me a bit worried. On this particular I get to be the engine architect, so I decided to start from zero and build an engine based on XNA. As it turns out, the lag in the samples actually came fro the way Silverlight processes events, so the XNA games runes smoothly on 60 fps. Leveraging on the power of C# (using reflections, serializing and a some generics abuse) in under two month we have developed and a system that has an in-game world editor, flexible gameplay elements, collision detection with a bit of physics and even our own profiler. In the last phase we will of course inevitable see the ugly side of C# when we'll need to optimize the whole thing to keep running on 60 fps.
The device also brought to attention some interesting design challenges, like which point of view to take so that from no angle the game looks upside down. And that thing should be addressed next week, hopefully just in time for me to report on it. In meantime you can check this video of some of the earlier prototypes.

Sunday, October 10, 2010

GDC Europe Retrospective


It took me some time to write few words for the GDC Europe and not because there wasn't much said on the conference. On the contrary there was so much material, that I needed some time to digest it and put in into the right perspective.
Me being in general on the technical side, I tried to catch as many of the technical lectures as possible and some were very insightful. I'll pick three of them that stuck to my mind and give a short overview.
Eric Chahi from Ubisoft gave a lecture on High-Performance Simulation, by going through the details of their Project Dust. Now named "From Dust", it is a god game where you have the ability to control a dynamic world shaped by the elements. The game achieves interactive simulation of earth, water and wind in the world, by subdividing it into a grid. Each grid cell is simulated separately, using the neighboring cells as inputs. This idea is often used weather prediction models, but what makes the current implementation is the extreme performance optimization done, so that it can run smoothly on consoles. All the data and code per cell are structured so that they fit in 256KB, so all calculations can be done on a Playstation's SPU's or in the case of the Xbox 360 without a single cache miss.
Michael Drobot from Reality Pump Studios gave a lecture on Advanced Material Rendering, which was mainly a collection of dirty tricks on Deferred Shading. Many of them used the long forgotten technique of dithering. Memorable lecture was also given by Mathew Rubin form Black Rock Studio, the focus of which was the “in studio” pipeline, which allows designers to construct and test their levels in shortest time possible. The topic of most of the lectures was quite narrow, but most importantly it gave a glimpse on how deep are developers prepared to dive to create next generation of games and supply their designers and artists with the best possible tools.
The lectures by Crytek and Autodesk were slightly disappointing in comparison and were used more as a showcase for their products than technology lectures. If I would have been a game producer making a choice which technology to license, the lectures would have been more helpful; but I am not.
The real jewel of the conference however is the mix of disciplines that it includes, so I later shifted my focus towards the fields less known to me, like game design, production and even marketing. The ideas presented were extremely helpful often timeless, as good design doesn’t go bad. Which is more than can be said for rendering techniques. Warren Spector’s keynote on the relation of games to other media has been a guideline for most of my recent game design decisions. The lecture by Louis Castle on how to survive the industry was least to say an inspirational one.
In conclusion, I was a great experience to be part of the game-making world. I would love to be there again, and next year with a project to showcase.